|
This instalment is something of a departure from our usual format... that is, I am not going to be the author! This foreword is my only contribution, save some minor edits where needed. I have asked for any ideas for other people to contribute to some material for our followers to try out and we have our inaugural response right here folks! This is the first in a two part blog from our contributor, the second will be published in the not too distant future... but for now, I shall hand you over to Mr. Paul Arrondelle on the subject of home winemaking..... Pedro. ------------------------------------------------------ Beginnings My introduction to wine making is not that uncommon with other people. In my case it was my Dad who made wine when I was a kid, but most people of my generation seem to have a relative, either their Dad or an Uncle, who home-brewed. I can therefore remember him using an aged juicer on evenings to get apples ready, and the fact that my Mum worked on a pick-your-own farm meant that we had so many strawberries that we got sick of them, leaving the surplus available for a far nobler cause. Even my brother got in on the act, as he managed to blag a wine making kit for a birthday one year. He can't have been much more than 10, but was still allowed to make it and the result was declared a "Hock", and drunk with Sunday dinner. I sort of remember asking for the same privilege, but never got it for whatever reason. Years later I did have a go and made some Elderflower, around age 14 or so. I have no idea how it turned out, as it got forgotten and then poured down the sink without a tasting. My actual start to wine making, and home-brewing at large, came at University. An office mate was a keen brewer and didn't take much persuading to get me to go down to the Boots in Leeds city centre and buy a beer kit, with all the ingredients and equipment needed to make 20 pints of lager. This was duly done, with reasonable results, but the space required didn't really fit in with the small flat I had; so at some point, and I can't remember how it came about, I bought "First Steps in Winemaking" by C.J.J. Berry and that was that really. Since then, for 17 years with breaks here and there, I've gone through phases of making beer and wine. It has to be said that at the moment I’m going through a pretty major phase, although the arrival of my son has hampered things of late. Still, I get to grab a moment here and there to keep things ticking over. What this blog will tell you When Pete first suggested that I guest write on his blog I thought it was a great idea. In fact I considered writing my own blog and just cross-posting to his every once in a while (still may do this!). My intention is to start off with wine for this post, then cover beer the next and spirits the one after. Once those are done I will probably concentrate on wine, for reasons that will become apparent, but I can be persuaded otherwise if need be. The reason that I’ve chosen wine is that it is far easier and takes up less space than making beer, and with spirits you don’t really make them (unless you’re breaking the law) you just add different flavours. Firstly you’ll need to get equipment. You don’t need much, in fact to get all you need to start off will cost you less than £25 brand new and some of it you may already have or can improvise. What you need is: * A vessel big enough for all the ingredients; * A method of moving the finished product around; and * A way of making sure that all parts that the wine touches are clean.
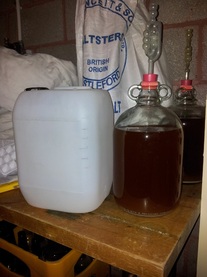
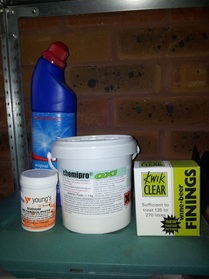
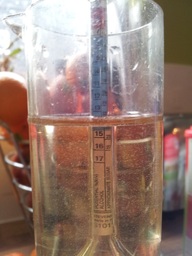
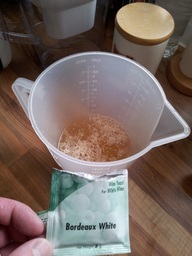
Of course you can go overboard and spend a fortune on much more, and indeed if you catch the bug this is exactly what you will do, but let’s keep things simple for now. I’ll go through one of the easiest recipes I know step by step and describe what was used along the way, with any shortcuts I can think of. “Aldi White” I found this recipe on a forum, where it was called “Lidl Red”. The principle is pretty basic, but a great idea - you buy 4 litres of cheap fruit juice and a kilo of sugar from a budget supermarket, put it all together and add some yeast, and in a month or two you have 6 bottles of wine. Easy as that! I considered starting by describing how to make a wine from a kit of concentrate, but to be honest this is easier and probably cheaper. Plus I felt that if I did that it would be akin to Pete blogging about a pot noodle that he made, or a pizza he ordered. Once I’ve covered the basics with this recipe I’ll expand out to wines that are a bit more adventurous, but for now this is as much about process as it is about content. 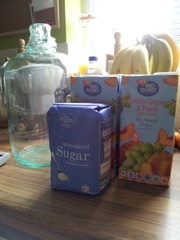 Ingredients needed for the 'Aldi White' Clean your fermentation vessel (FV), be it a demi-john or just an old 5 litre water bottle, using hot water and washing up liquid, then sterilize it. This can be done with a purpose made home brewing chemical, or with household bleach. The only disadvantage to bleach is that it is a bit of a bugger to rinse out, as I tend to get paranoid about any faint whiff of it still in the FV when actually I’m probably just smelling it on my fingers. And yes, I did say when rinsing out. You basically spend ages getting your kit sterile and then rinse it all off with tap water. Don’t ask. The way around this is to use “no-rinse” sterilizers, which of course cost more. The bottom line is keep everything clean and you should be fine. For all of the gallons that I’ve made over the years I’ve never lost anything due to lack of cleanliness. Because I’ve got the equipment I measured the specific gravity of the fruit juice using a hydrometer and a test jar. By doing this I have estimated the sugar content and so the potential alcohol I can get. It came in at 5%. The rule of thumb is that for every pound of sugar added to a gallon (sorry for mixing metric and imperial!) you add 5% to the wine, so if I had just mixed the juice and sugar that I bought in the same jar, then provided it all fermented out I would have had a fruit wine of between 15 and 16%. Not bad. In actuality I followed a slightly different route; I emptied one litre of juice into a pan, heated it and dissolved half the sugar in. Once it had gone into solution I mixed all of the juice together into my demi-john then poured some out into my trial jar to re-check. The potential alcohol came out at 10% so I added another 250g and remeasured - it came out at just over 13% which is what I was aiming for. Why? Different yeasts will ferment to different strengths. When I started out you only really went up to 12-13% unless you used a specialist yeast. Now you can go up to 23%, but the yeast I am using is unknown to me and if I added a shed load of sugar and it didn’t ferment out I would be left with an over sweet wine. Once that happens you either have to put up with it, or get into all sorts of trouble trying to restart the fermentation. Too much bother! If the wine ferments out all the sugar you can always add some extra - once the sugar is in though you can’t take it out. Needless to say if you are trying this recipe all you have to do is use a yeast that will ferment to 16% or higher and you should be fine without needing to buy a hydrometer. This also neatly bypasses the fact that the reading that you take is dependent on the temperature of the solution. Kit required so far: FV, cleaner, hydrometer & trial jar (optional), yeast. 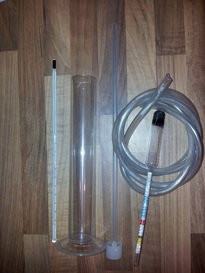 Hydrometer Kit Once you have the potential strength you want the solution goes into your FV , you add the yeast you have chosen to use and seal the FV. If you are using a demi-john you would most likely use an air-lock of some kind, but you can just put a tea-towel over the top, use kitchen roll and an elastic band, or just the bottle closure without screwing it down air tight. What you are trying to do for the time being is keep dirt and bugs from getting in but allowing the carbon dioxide generated by fermentation out. Once closed, simply leave in a warm-ish place until the yeast has worked its magic. Again this depends on the variety, but it will take around 2 weeks for a modern yeast and around 4 for an older style one. You can tell that this has happened in a number of ways. The easiest is the hydrometer again; modern ones even have a scale that estimates where you are but if you are fermenting to dryness then the gravity will be 1.0 or less. Without the hydrometer you can watch the airlock for bubbles or make the FV air tight and see if it pressurises. Once fermentation has finished you should keep air from getting to the wine so that it doesn’t spoil, and let the yeast settle at the base.
We’re almost there now, just a couple of steps left. The next operation is to get the fermented wine off the spent yeast, and this is usually done by syphoning into a second FV. If you use a tube with a special foot in it then it will draw the liquid from above, and so minimise the amount of yeast that transfers across. You may want to add finings at this point to make perfectly clear wine, but you don’t have to. Finally start thinking about storage. The best way is to use old wine bottles, and if they have a screw cap even better. Clean them out and sterilize them, then use the syphon again to fill them from the FV. Cap and store, then drink! Needed kit: FV, cleaner, yeast, FV closure or airlock, syphon tube and foot, second vessel capable of holding 5 litres Optional kit: hydrometer and trial jar, thermometer, finings, second FV You’ll most likely get 5 ½ bottles from this after wastage, which for the outlay isn’t bad. Do this a few times and the kit will pay for itself. Next time Beer making, and why you shouldn’t do it. Recommended Suppliers Basics, on the high street - Wilkinsons (http://goo.gl/hy3hD) Basics, on the web - Amazon More advanced - http://www.the-home-brew-shop.co.uk/index.html or http://www.art-of-brewing.co.uk/ My local home-brew shop (LHBS) - Arkwrights (http://www.arkwrightshomebrew.com/catalog/index.php)
2 Comments
|
Archives
April 2022
Archives
April 2022
Click ^ the RSS Feed to follow me
Categories
All
|
 RSS Feed
