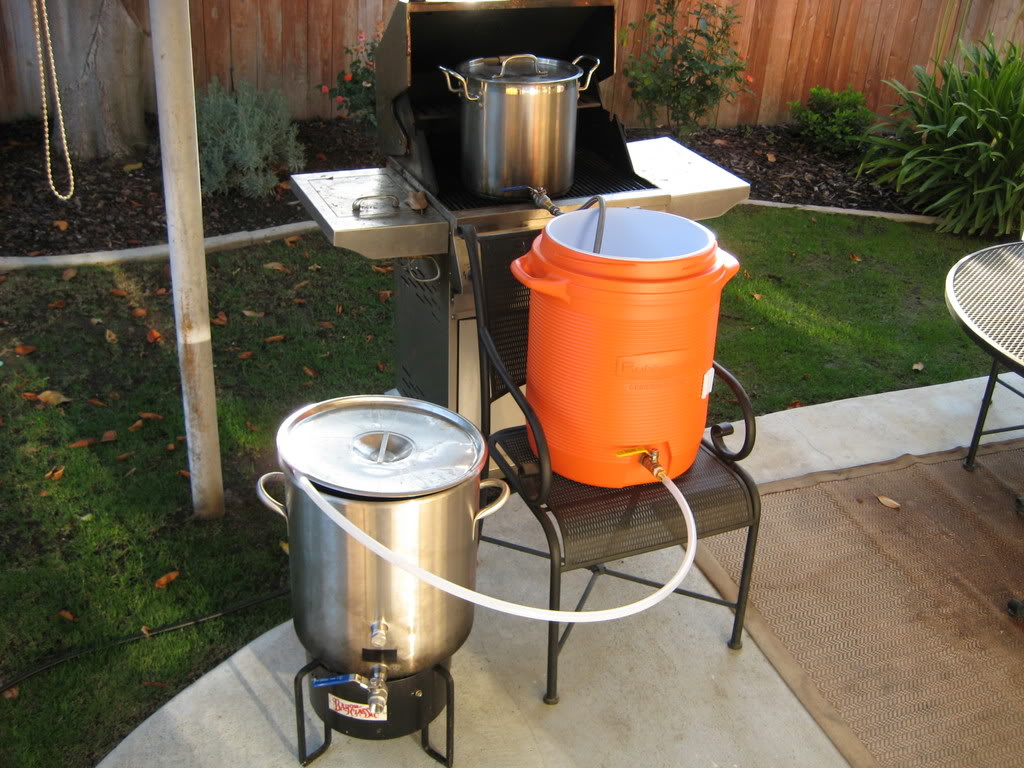
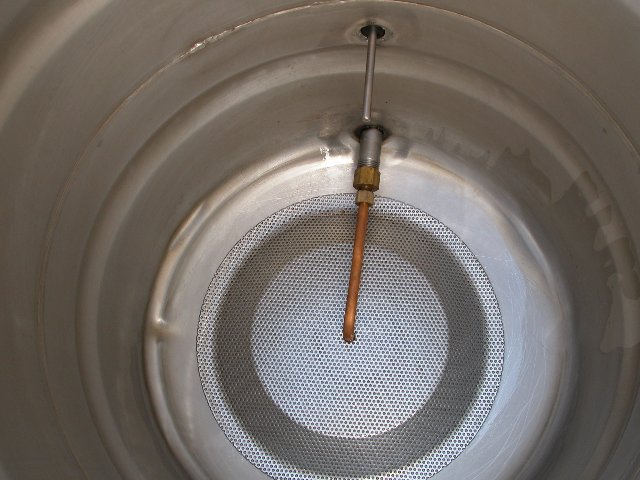
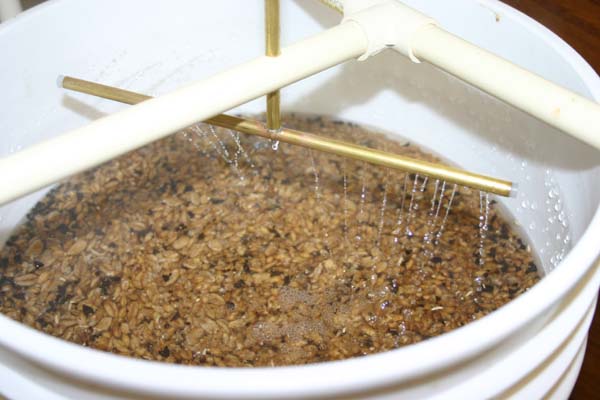
Time for another (somewhat belated than promised) guest blog from my friend, Paul Arrondelle, who has been an avid homebrewer for many years and on the last outing back in February 2012 [http://electrokemistcuisine.weebly.com/blogs/home-winemaking-guest-author-paul-arrondelle1] gave us an insight into his method for fermenting a basic wine at home. On this occasion, he talks about Homebrewing of beer and outlines some basics that might get some creative juices flowing. A rather timely addition to the blog too, considering the recent announcement of the winner of the Homebrew Challenge was announced a few days ago, in the guise of Graham Nelson's Vienna IPA. This is going to be realised through full production by Thornbridge and be in Waitrose by October apparently. Full details are here: [http://siba.co.uk/2014/08/the-great-british-home-brew-challenge-2014-winner-is-announced/]. I will be looking to get my hands on this promptly! Back to business... full contact details are given at the bottom of the article, but feel free to fire over any questions on the comments section below. Without further ado, I’ll let Paul’s words take the front…. ---------------------------- In my last post I talked about winemaking, and finished with the line that the next blog would be about beer making and why you shouldn’t do it. That needs some explaining really. The wine that I described making isn’t really wine, not in the traditional sense. It was a fruit based drink with the same alcohol content as wine. I realise it sounds like I’m splitting hairs but the reason why I make this distinction will become apparent shortly. Nevertheless, as far as the UK goes, I described wine making and it is pretty easy. If you can make soup you can make wine, and that’s the rub – beer making is different. It is complicated, requires some specialised equipment, and takes a large proportion of a day to do. Of course, if you were to make wine the proper way, from grapes and using natural yeasts, it is just as complicated and time consuming. You don’t however, and hence some beer makers look down on wine as being easier and therefore inferior. Firstly let’s go through the steps that are required to make a beer from its component parts, known as “all grain” brewing. This procedure is common whether you are in a shed or producing thousands of gallons a year, as anyone who has done a brewery tour will recognise. There is a fair amount of jargon involved but I’ll try to keep things simple. 1) Mashing; this is where you take the malted barley for your beer and soak it in water (liquor) at around 70°C for a period of time, usually 1 ½ hours. 2) Sparging; after drawing off the water that you’ve soaked the grain in, rinse the grain with more water 3) Boiling; take the mashing and sparging water (now called wort) and boil for 1 ½ hours. Add hops at beginning and end of boil depending on recipe 4) At end of boil cool the wort to room temperature, either with some kind of heat exchanger or by leaving overnight, transfer to a fermentation vessel and add (pitch) yeast 5) Leave until fermentation is complete then transfer to either barrel or bottles There are a few parts I’ve missed out but these are the basics. In total steps 1 – 4 take around 6 hours (plus overnight if needed), fermentation is 5 – 10 days and conditioning before drinking can be 1 week to 1 month depending on if you use a barrel or bottles. There are variations and shortcuts that can be taken but these are reasonable ballpark figures.
So why do it the long way? Well, if you get it right it can be the best beer you’ve ever tasted. It will certainly be the cheapest in terms of ingredient cost, and it will be the quickest despite the length of your brew day. All-grain ferments faster and is ready to drink about a week afterwards if barrelled, while kit beer usually needs a month and has a reputation for a slight after-taste even then. Also there is the satisfaction of having made your own beer from the bare ingredients, surely on a par with hunting and gathering!
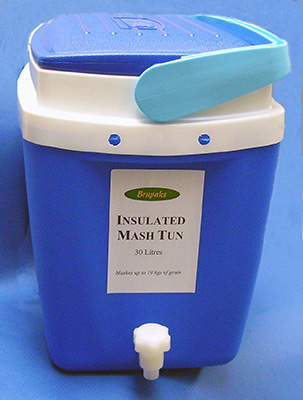
To be honest, it is pretty easy to move up to AG brewing in stages, as can be seen above. I’d reckon that anyone who is methodical could start straight away but perhaps starting with kits would at least allow for a person to get a feel for if they want to be a brewer. And for the record, I use BIAB and am more than happy with the results, but if I had the space and the money I’d go for more traditional mashing/ sparging.
Places you can buy the things you need: - The Art of Brewing (http://www.art-of-brewing.co.uk/); excellent general supplier with free shipping on orders over £49. - The Malt Miller (http://www.themaltmiller.co.uk/); formerly exactly as the name suggests but now expanded into a full range of products. I’ve met the owner Rob is he’s an absolutely top bloke, happy to help and give advice. - Wilkinsons (http://www.wilko.com/); basic equipment and kits, either on the high street, depending on the store, or online. Good prices. - The Home Brew Shop (http://www.the-home-brew-shop.co.uk/index.html); similar range to Art of Brewing and Malt Miller, they also run half day courses in how to do AG brewing at a reasonable price but you have to get to Aldershot for it. - https://twitter.com/TheHomeBrewShop Sources of information: - Jim’s Beer Kit; fantastic resource and great forum http://www.jimsbeerkit.co.uk/index.htm - https://twitter.com/JimsHomebrew - How to make your own brewery: http://www.instructables.com/id/Build-Your-Own-Brewery-for-Under-100-STEP-1-/ Thanks for reading! Paul Arrondelle.
0 Comments
 Having had some ideas seeded from my sister-in-law, plus the picking of her most competent home-cooking brain, I decided to refine my recipe used to make pizza dough and found the key to use ‘00’ grade flour along with extra rising time and to allow the dough to stay relatively moist. Everyone has their favourite style, although mine remains sticking to a more traditional Italian style and using as little dough as possible, keeping the dish thin, crisp and light with relatively few ingredients as toppings. 2009 saw Italy winning Traditional Speciality Guaranteed status for its Neapolitan Pizza, using a strict list of ingredients and made within the region of Naples. The recipe below should be good starting point for making your own pizzas, but the key is to cook it quickly on a high heat, ensuring that the oven is as hot as it will go before each pizza is placed into the oven. Pizza Dough – Makes 5-6 pizzas 450g ‘00’ Grade Flour (plus extra for dusting/working the dough) 1 tsp Salt 7g sachet of Yeast ~30 tblsp Water (plus more if dough isn’t malleable enough) 4 tblsp Olive Oil plus extra for oiling the proving bowl 1/2 tsp Bicarbonate of Soda ½ tsp Caster Sugar 1 Large Egg For the sauce: 250ml Passata 1 tblsp Tomato Puree 1 tsp of Oregano (optional) ½ tsp White Sugar 1 tsp Balsamic Vinegar 1 Clove of Garlic (crushed in the skin)
To make the sauce: 1. Heat the passata until begins to simmer, reduce the heat and add the sugar, garlic, the tomato puree, oregano and vinegar. 2. Continue heating for 5-10 minutes stirring occasionally and then leave to rest. 3. Ensure the sauce is warm and thickened before adding approximately 8-10 tblsp to a pizza base, spreading this out in a circular motion. See the method below for making the dough…. To make the dough: 1. To five tblsp of warmed water add the cast sugar and then the dried yeast; leave this to grow for 5-10 minutes. 2. Mix the ingredients together aside from the yeast and sugar, sieving the flour into a mixing bowl to combine with the salt and then add the egg and oil, adding the rest of the water a little bit at a time to the mix whilst turning with a spoon. Now add the yeast/water/sugar Mixture. 3. Mix the ingredients thoroughly as other bread dough, adding water or additional flour as required. The dough should feel silken and slightly tacky, but not stick too firmly to a work surface. Continue working the dough vigorously for at least 5-10 minutes. 4. Oil a large mixing bowl and place the ball shaped pizza dough (which should also be dusted with flour prior to placing the bowl) in to prove. Cover the bowl with cling film and leave in a warm place for at least an hour until doubled in size. 5. Once proved, work the dough gently again, adding flour as required and then repeat the proving process in step 4 above once more. 6. Tear off Balls of approximately 90-100g of dough from the proven pizza dough, use your fingers and knuckles to spread the dough out in a circular motion, finally use a rolling pin to flatten out to a 2-3mm thickness and place this on a baking net or tray (I have found the nets work really well in the absence of a pizza stone, rather than a tray). Add the tomato sauce, cheese and toppings as required (do not overload on any of the toppings, particularly in the centre of the pizza – this will allow the pizza to remain crisp and light). 7. Bake in a preheated oven on a baking tray or preferably a baking net, on the maximum temperature until the cheese is melted completely or the edges of the pizza crust are a golden to dark brown colour. 8. Enjoy! There are a multitude of toppings you can add, bearing in mind that the old adage that less is more usually is right! Whilst the addition of cured meats is a savoury treat, satisfaction from a simple margherita style offering using only tomato (san marzano – strictly speaking), cheese (buffalo mozzarella) and basil (if required) will do a fine job of providing joy. I’m a sucker for pepperoni, speck or chorizo though! Ciao! Pedro. x 
Quite often, fusion dishes can be very off-kilter in terms of ingredients clashing and jarring once tickled your taste-buds. On this occasion, I was faced with a dilemma of choosing between something traditionally British of the roast variety, or to have something Chinese to see in the New Year. I chose to try and sate both needs in one dish and think it came off rather well. The dish is essentially roasted beef sausages (you can use roast beef – which would probably be just as satisfying), with a giant Yorkshire pudding and oriental greens in a spiced gravy. Trust me, it worked. What you Need (to make two portions): 4-6 Beef Sausages 1 pak choi, washed and shredded 2 stems of celery, chopped coarsely small handful of Mange Tout 1 green pepper 1 red chilli, sliced finely 1 clove garlic, chopped finely or minced For the batter: 150ml whole milk 3-4 eggs pinch of sugar pinch of salt 110g of plain white flour 1 tsp szechuan pepper ½ tsp black pepper Beef Dripping and vegetable oil for cooking For the Gravy: Stock made from the vegetable off cuts (100ml) 1 beef stock cube 2 bay leaves 2 tsp dark soy 1 tsp light soy 1 tsp szechuan pepper ½ tsp Chinese five-spice 1 tsp rice vinegar additional water or stock to loosen as required
What to do: 1. Prepare the Pudding batter at least 90 minutes before cooking, combine all the ingredients and fold into one another without being too rough, once homogenised, leave in the refrigerator for at least 60 mins. Take this out and allow to reach room temperature before cooking. 2. Roast the sausages in the oven at 225 C until dark brown, set aside or leave in oven to cook with the Yorkshire puddings which are ready around 20-30 minutes after putting in the oven at the highest setting, ensuring the pudding trays are hot before adding the batter – this is crucial!! Use a liberal amount of beef dripping and the vegetable oil in the pudding trays, heat these up on a hob until smoking and ensure they are hot all over before adding the batter mix equally between two 6-7” pie dishes/pudding trays. The puddings are done once they have risen and are dark brown and golden all over where you can see. 3. Stir fry the vegetables, doing the celery first over a medium heat in a pan or wok, add the garlic and chilli followed by the other vegetables one at a time, not over cooking and allowing them to retain a crunch and freshness. Add the pak choi last, turning off the heat and immediately place a lid over the top, allowing the vegetables to steam. 4. Pour the stock (made from boiling the offcuts of the vegetables and the bay leaves for 15 mins if you don’t have prepared stock) into a saucepan and simmer with the stock cube, soy and szechuan pepper until reduced and thickened, you can use a roux or browning to thicken the sauce if you want plenty of gravy. Turn off the heat once your preferential consistency is almost reached and add the rice vinegar and five spice, stir these in whilst the gravy is still hot and serve immediately by pouring over the sausages, veg and pudding.
Satisfyingly earthy, meaty, tasty and fresh. Enjoy and feel free to share any anecdotes of attempts below the line! Pedro. x |
Archives
April 2022
Archives
April 2022
Click ^ the RSS Feed to follow me
Categories
All
|


 RSS Feed
