It’s quite easy to get bitten by the bug to make your own bread, albeit a rather time consuming and at times initially frustrating bug. Once you’ve gotten the technique nailed, then there’s a bit of play in what you can do to flavour a loaf of bread, changing the types of flour you use, the amounts of salt and adding fruit, nuts or herbs can also provide an interesting twist. I have even ventured into the realms of making ‘Twiglet Bread’. Having read a number of blogs on the subject and already being a firm believer in making my own naan bread from scratch and using a rather handy bread making machine, the transition to hand made bread was relatively smooth. The biggest alteration made though, was to make my own sourdough bread rather than using vacuum packed dried yeast – although that said, you can use both in tandem to some very satisfying results. The premise of using a sourdough starter for your bread is quite simple; it uses ‘wild’ yeast that is present in the flour or in the environment of wherever you leave your initial starter to ‘catch’. There are a number of blogs that have been written on how to make a starter, I will leave people to their own devices to do an internet search for this material and decide which author they want to follow. I forget now which method I used as my starter (to date) is approximately a year old (which is nothing, as an aside, there is a famous bakery in New York which uses a starter that was conceived when the establishment was set up for its bagels/beigels, supposedly over 200 years old now). The key is to use organic flour in a clean jar say, 50-100g with enough water to make it to a paste consistency. Leave it with the jar on the lid, but not screwed on, to allow the flour/water mix to breathe and ferment. It will take a few days to get going and it won’t smell too pleasant to most people, half gets thrown away and the other half goes on to be fed with more flour and water, taking off what you need to start making a loaf, buns or bagels etc. Exact protocols for making this are widely available on the internet as I said!
Once you have a controlled culture of sourdough, you can start making delicious bread that has an incredible amount of taste compared to the mass-produced loaves you buy in supermarkets and even most chain bakeries. I’ll list two of my attempts at flavoured bread which have both gone down quite well. First is the infamous ‘Twiglet Bread’, which is flavoured with the love/hate agent – yeast extract (yes, yes… okay Marmite is the one that’s synonymous): Ingredients 250g of Sourdough Starter (using organic strong white bread flour) 3.5g Dried Yeast upward of 20ml Water (depending on how thick the starter is!) 2 tblsp Olive Oil 1 medium Egg 1 ½ tsp Sugar 2 tsp Salt 1 tblsp Yeast Extract 1 ½ tsp Baking Powder 1 ½ tsp Bicarbonate of Soda 100g of Rye Flour 100g of Wholemeal Flour 140g of Strong White Bread Flour (this amount can be increased if needed to get the right consistency of dough) plus extra for dusting Topping 1 tsp Honey (optional) 2 tsp Sesame Oil 3 tsp Yeast Extract 1 tblsp Hot Water 
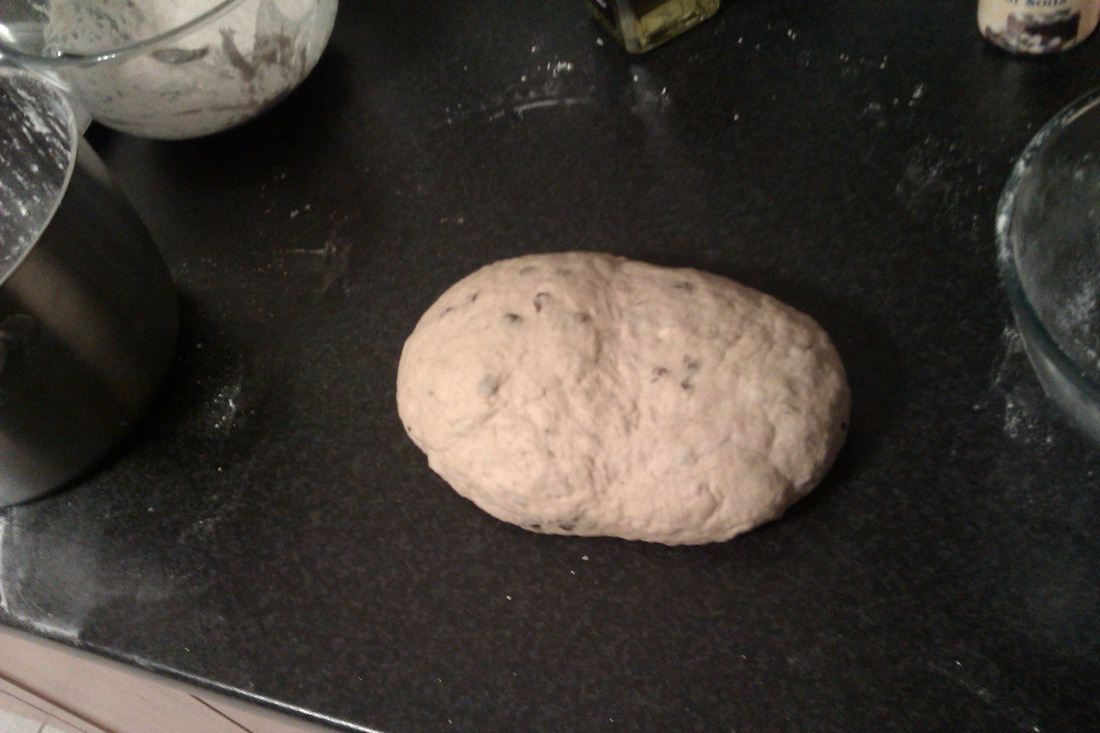
Twiglet Bread ready to bake!
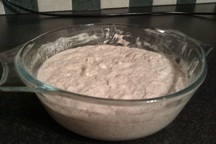
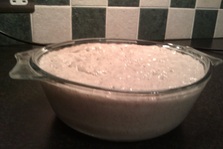
What to do 1. Combine the ingredients for the dough, dry ingredients first – make sure the white flour is sifted into the mixture (sieve or dredger is fine!), into a large mixing bowl and use a wooden spoon to stir them together, adding water as you go until the dough is to the right consistency. The wet sourdough starter and egg should provide the bulk of the moisture for the dough as it is. Once the dough is to a manageable consistency, flour a flat surface to manipulate your dough and knead it until it is thoroughly mixed and the colour is completely uniform through the dough which should be a slightly silky and elastic finish (you want to ensure even spread of the yeast and marmite etc in the dough to ensure an even rise and no concentrated pockets of flavour!!). 2. Allow the dough to rise in a warm place, put in the bowl and cover with a damp cloth or some cling film. Allow at least 2 hours or until the dough doubles in size. At this stage, you can either manipulate the dough further (and allow a second rise by bashing the air out of the dough and then shaping the loaf into your desired shape and leaving it to prove for 30mins to an hour) or you can gently shape it and then apply a ‘baste’ and get straight on with the baking! To shape the loaf, generally it works well to fold the edges back into the centre gently but repeatedly, then place the folded side on the bottom and use the heels of your palms to rotate the bread to make it to a smooth 3. Once the loaf is in the desired shape, lightly oil the baking tray or tin to ensure the bread won’t stick to the surface. You’ll now need to slash diagonally across the top of the loaf and then prepare the topping/baste to finish your twiglet bread. Stir the yeast extract into the hot water, add the sesame oil and honey once it has dissolved into the water and become thinner in viscosity, stir vigorously to ensure the oil and honey are also into the topping. Now use a pastry brush to spread the topping over the loaf before you place it in the oven to bake. 4. All ovens are different, but most will take at least 35 mins at gas mark 7 or 8, the key is to ensure the bread rises a little more and you can tell if it is done by tapping the bottom of the loaf – a hollow thud should tell you that it is done! You’re on your own for this bit I’m afraid! 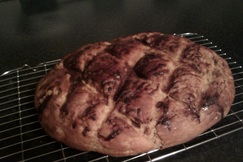
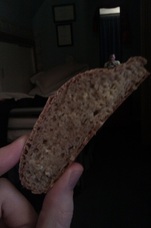
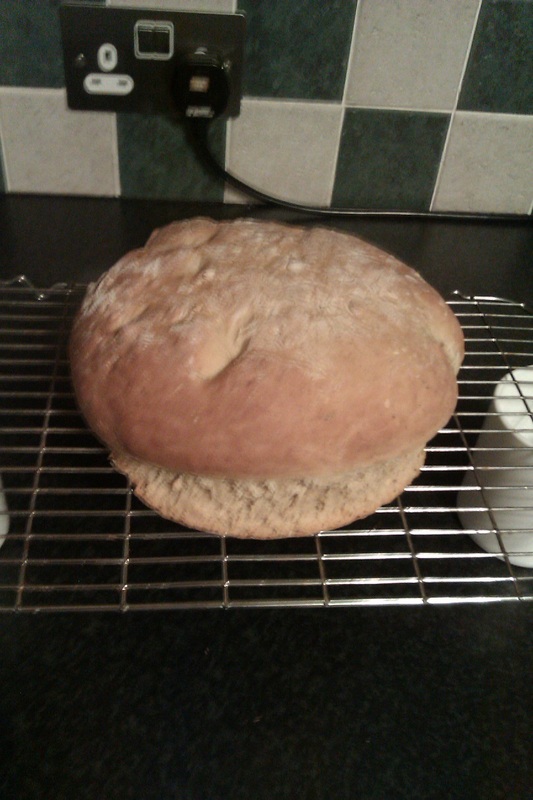
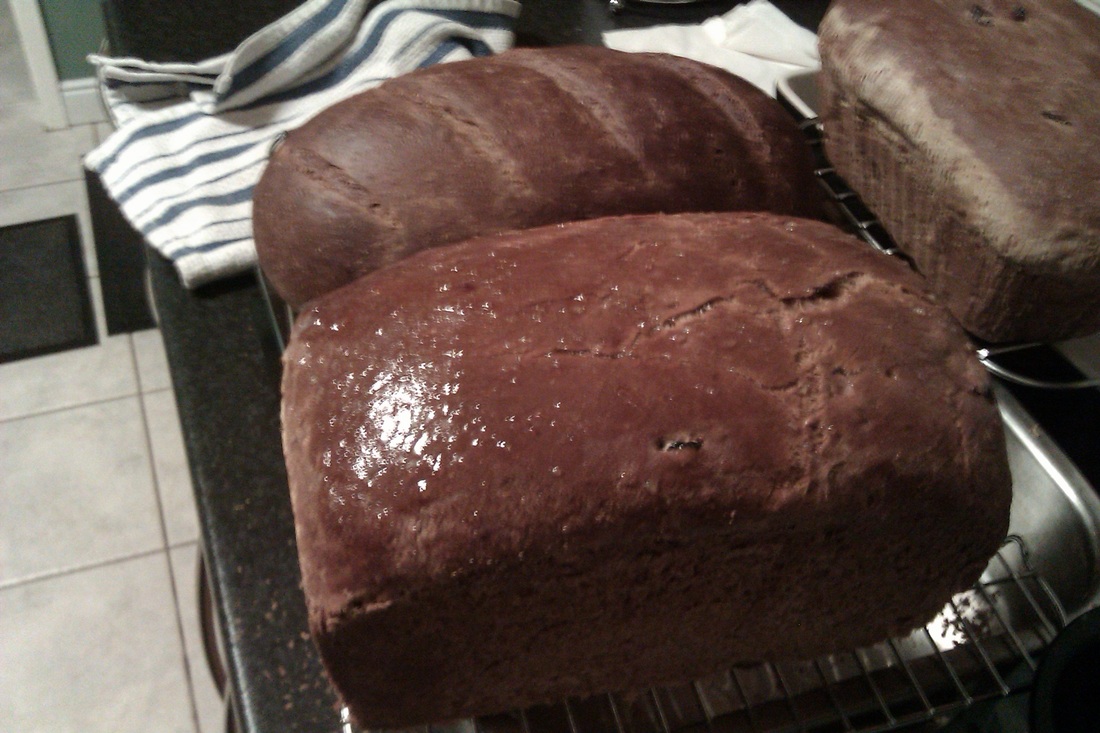
Twiglet Loaf
Uncle Pedro’s Orange Loaf Ingredients 250g of Sourdough Starter 340g of Strong White Bread Flour (this amount can be increased if needed to get the right consistency of dough) plus extra for dusting 3.5g Dried Yeast 1 medium Egg 25g Light Muscovado sugar 75g of Raisins or Sultanas ½ tsp Caraway seeds 1 Whole Orange (Zest and Juice) 1 ½ tsp Bicarbonate of Soda 1 ½ tsp Baking Powder 2 tblsp Olive Oil – or – 15g of Butter (unsalted) Glaze 1 tblsp Marmalade (whichever takes your fancy) 1 tsp Honey 10ml Boiling Water ½ tsp Light Muscovado sugar 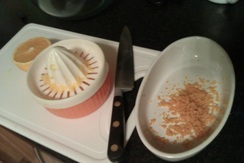
Collecting the Orange Zest and Juice...
What to do The way to make this loaf is essentially the same as the other twiglet loaf, aside from the different ingredients. 1. Combine the ingredients for the dough as with the twiglet bread, ensure that your sultanas or raisins are in the mix and bound well into the dough, you can combine the dry ingredients first – make sure the white flour is sifted into the mixture (again, a sieve or dredger is fine!), into a large mixing bowl and use a wooden spoon to stir them together, adding water as you go until the dough is to the right consistency. The wet sourdough starter and egg should provide the bulk of the moisture for the dough as it is. Once the dough is to a manageable consistency, flour a flat surface to manipulate your dough and knead it until it is thoroughly mixed and the colour is completely uniform through the dough; which should be a slightly silky and elastic finish. 2. Allow the dough to rise in a warm place, put in the bowl and cover with a damp cloth or some cling film. Allow at least an hour or until the dough roughly doubles in size. At this stage, you can either manipulate the dough further (and allow a second rise by bashing the air out of the dough and then shaping the loaf into your desired shape and leaving it to prove for 30mins to an hour) or you can gently shape it and then apply a marmalade glaze and get straight on with the baking! 3. Once the loaf is in the desired shape, lightly oil the baking tray or tin with olive oil or preferably butter, to ensure the bread won’t stick to the surface. You’ll now need to prepare the orangey glaze to finish your loaf. Stir the marmalade into the sugar and hot water, add the honey, then once it has dissolved into the water and become thinner in viscosity, stir vigorously to ensure an even consistency with the glaze. Now use a pastry brush to spread the glaze over the loaf before you place it in the oven to bake. 4. All ovens are different, but most will take at least 35 mins at gas mark 7 or 8, the key is to ensure the bread rises a little more and you can tell if it is done by tapping the bottom of the loaf – a hollow thud should tell you that it is done! You’re on your own for this bit I’m afraid due to the difference in ovens! 5. Leave this loaf for at least a couple of hours to rest - as it will still be fairly sticky. You can always lightly dust the glaze with some icing/confectionary sugar for ease of storage if you do not have an airtight box large enough.
The shelf life of these loaves is actually relatively lower than mass-produced sliced loaves, so it is best to store these loaves in a refrigerator if possible and get them eaten within a week to ten days. The sourdough mix may taste much better, but it does mean the bread becomes quite tasty for those microbes that will spoil your creations! Good luck, if anyone wants any advice or is nearby and wants some sourdough starter from me, please give me a shout, it’s very easy to cultivate and look after if you’re on the ball! See you again soon! Pedro. x
0 Comments
Happy New Year mi rasa!
I hope everyone had a fulfilling and relaxing Christmas with plenty of food and drink, which is usually a mainstay during the holidays for most of my acquaintances anyway! This year should see a bit more blogging from me, especially with some audience participation thrown in, I have two main ideas already that I have put feelers out for... so I am going to need guinea pigs at some point and a location to hold a little ElectroKemistry experimentation. I also have a delicious recipe for Brandy Cream Prawns that I have done as a starter for Christmas the last 2-3 years and not had a single complaint from and 100% record with almost-licked-clean plates (even from a family member who doesn't like 'crustaceans' and shellfish!). Once I get my photographs back from the lovely photographer, I'll have the blog up in a jiffy for everyone to have a try themselves if they can suffer a meal with a few extra calories to swerve the diet momentarily! With regards other ideas for blogs, if anyone has come across anything particularly special lately then please don't hesitate to be in touch and I can look at putting an article together with your input. I currently have two guest writers who are going to supply something special for you guys to have a crack at this year. If anyone has any dietary advice to help those of us with burgeoning wastelines after an excessive festive period, that would be not only topical but also very useful! As an aside, loosely related to food, a friend of mine who has been travelling around the world a bit the last few years with his remarkable eye for a photograph and trusty camera has also been blogging. He has been volunteering for a relatively young charitable organisation in India called 'Food for Life Vrindavan' which helps get children a decent diet, education and clothing, his own blog covers his actions and details for the charity (which can also be found on: http://fflvrindavan.org/en/). If you find yourself with a few minutes to spare, it might be worth having a browse and contacting Rebelsatellite if you have any thoughts. Here's to a cracking start to 2012 guys! Onward and upward! Pedro. x |
Archives
April 2022
Archives
April 2022
Click ^ the RSS Feed to follow me
Categories
All
|

 RSS Feed
